lunes, 23 de mayo de 2022

RCLONE Onedrive

Configuration

The initial setup for OneDrive involves getting a token from Microsoft which you need to do in your browser. rclone config walks you through it.

Here is an example of how to make a remote called remote. First run:

 rclone config

This will guide you through an interactive setup process:

e) Edit existing remote
n) New remote
d) Delete remote
r) Rename remote
c) Copy remote
s) Set configuration password
q) Quit config
e/n/d/r/c/s/q> n
name> remote
Type of storage to configure.
Enter a string value. Press Enter for the default ("").
Choose a number from below, or type in your own value
[snip]
XX / Microsoft OneDrive
   \ "onedrive"
[snip]
Storage> onedrive
Microsoft App Client Id
Leave blank normally.
Enter a string value. Press Enter for the default ("").
client_id>
Microsoft App Client Secret
Leave blank normally.
Enter a string value. Press Enter for the default ("").
client_secret>
Edit advanced config? (y/n)
y) Yes
n) No
y/n> n
Remote config
Use auto config?
 * Say Y if not sure
 * Say N if you are working on a remote or headless machine
y) Yes
n) No
y/n> y
If your browser doesn't open automatically go to the following link: http://127.0.0.1:53682/auth
Log in and authorize rclone for access
Waiting for code...
Got code
Choose a number from below, or type in an existing value
 1 / OneDrive Personal or Business
   \ "onedrive"
 2 / Sharepoint site
   \ "sharepoint"
 3 / Type in driveID
   \ "driveid"
 4 / Type in SiteID
   \ "siteid"
 5 / Search a Sharepoint site
   \ "search"
Your choice> 1
Found 1 drives, please select the one you want to use:
0: OneDrive (business) id=b!Eqwertyuiopasdfghjklzxcvbnm-7mnbvcxzlkjhgfdsapoiuytrewqk
Chose drive to use:> 0
Found drive 'root' of type 'business', URL: https://org-my.sharepoint.com/personal/you/Documents
Is that okay?
y) Yes
n) No
y/n> y
--------------------
[remote]
type = onedrive
token = {"access_token":"youraccesstoken","token_type":"Bearer","refresh_token":"yourrefreshtoken","expiry":"2018-08-26T22:39:52.486512262+08:00"}
drive_id = b!Eqwertyuiopasdfghjklzxcvbnm-7mnbvcxzlkjhgfdsapoiuytrewqk
drive_type = business
--------------------
y) Yes this is OK
e) Edit this remote
d) Delete this remote
y/e/d> y

exit q

 ##

List directories in top level of your OneDrive

rclone lsd remote:

List all the files in your OneDrive

rclone ls remote:

To copy a local directory to an OneDrive directory called backup

rclone copy /home/source remote:backup 
 

Mount Google Drive Locally Using Rclone

$ mkdir ~/gdrive
rclone mount remote: ~/gdrive/ 
fusermount -uz ~/gdrive

miércoles, 18 de mayo de 2022

IO Error:Cannot open image while generating barcode after freezing using py2exe

I have used pyBarcode library to generate Barcode in my software and its works perfectly fine while I load it from command line but once I freeze the entire software using py2exe I am getting IO error while generating the barcode.

File "panels.pyc", line 383, in generate
File "barcodeGenerator.pyc", line 9, in generate
File "barcode\base.pyc", line 68, in save
File "barcode\codex.pyc", line 251, in render
File "barcode\base.pyc", line 103, in render
File "barcode\writer.pyc", line 188, in render
File "barcode\writer.pyc", line 280, in _paint_text
File "PIL\ImageFont.pyc", line 248, in truetype
File "PIL\ImageFont.pyc", line 146, in __init__
IOError: cannot open resource  

The solution is quite strange and it is mentioned in IO Error:Cannot open image while generating barcode after freezing using py2exe but what you need to change has changed a tad bit so felt I could make this thread to help any beginners not knowing how to fix this.

The solution is to change this line of code:

self.font_path = os.path.join(PATH, "fonts", "DejaVuSansMono.ttf")

In the file writer.py in C:\Users\TERMINTATOR\AppData\Local\Programs\Python\Python310\Lib\site-packages\barcode .

To this:

self.font_path = 'arial.ttf'
https://stackoverflow.com/questions/71448645/after-turning-a-python-file-into-a-exe-file-the-barcode-module-stops-working

martes, 17 de mayo de 2022

PyInstaller Quickstart

 https://stackoverflow.com/questions/5458048/how-can-i-make-a-python-script-standalone-executable-to-run-without-any-dependen 

PyInstaller Quickstart

Install PyInstaller from PyPI:

pip install pyinstaller

Go to your program’s directory and run:

pyinstaller yourprogram.py

This will generate the bundle in a subdirectory called dist.

py -3.10-64 -m PyInstaller -F yourprogram.py

Adding -F (or --onefile) parameter will pack everything into single "exe".

py -3.10-64 -m PyInstaller -F --paths=<your_path>\Lib\site-packages  yourprogram.py

running into "ImportError" you might consider side-packages.

pip install pynput==1.6.8 
py -3.10-64 -m PyInstaller --onefile yourprogram.py 

sys.argv[1] python How to Pass Arguments to a Python

import pywhatkit
from datetime import datetime
from dateutil.relativedelta import relativedelta
import sys

telefono = sys.argv[1] # int(input("ESCRIBE EL TELEFONO:"))
folio = sys.argv[2] # int(input("ESCRIBE EL FOLIO:"))

current_time = datetime.now()
n = 2
future_time = current_time + relativedelta(minutes=n)

pywhatkit.sendwhatmsg("+521"+str(telefono), "https://barcode.tec-it.com/barcode.ashx?data="+str(folio)+"&code=Code128&translate-esc=on", int(future_time.strftime('%H')), int(future_time.strftime('%M')))


then use pyinstaller to create a .exe and run like this:

myprogram.exe 0000000000 000000

lunes, 9 de mayo de 2022

insert into table from executed store

 INSERT INTO 

    your_table (

           Id_1,

           Id_2,

           desc,

           total 

) EXECUTE your_store @id_1, @id_2

jueves, 5 de mayo de 2022

SQL server LOOP


    Select Id_ as Id
    Into   #Temp
    From   your_table
    where that = 'blabla' and this = 'something something dark side'

    Declare @Id int

    -- WHILE

    While (Select Count(*) From #Temp) > 0
    Begin

        Select Top 1 @Id = Id From #Temp

            -- Do some processing here
            -- OK

        Delete #Temp Where Id = @Id
    End

SQL server procedure create date

 SELECT [name], create_date, modify_date
FROM sys.procedures
ORDER BY 3 DESC;

XML to tables with OPENXML

 https://dba-presents.com/index.php/databases/sql-server/42-shredding-xml-to-tables-with-openxml

Storing data in XML documents and in tables have different advantages and disadvantages. For example tables make joining data easy so even if you receive data in XML format or even store it that way, you may want to convert it to tables even temporarily.

One of the possible ways is using OPENXML. It is a statement that returns a view with data based on parameters passed into it. There are two obligatory arguments:

  • a handle to the XML document which is going to be converted; can be created using the sp_xml_preparedocument procedure,
  • a path that points to nodes in the XML that are going to be converted into rows.

The third but optional argument is a flag indicating whether XML attributes, elements or both are sources of the data in the XML document.


Simple OPENXML usage

DECLARE @xml NVARCHAR(4000);
DECLARE @doc INT;
SET @xml =
'<transactions> <group> <name>gold members</name> <account id="1"> <name>Account 1</name> <transaction id="1"> <type>credit</type> <value>10000.0000</value> </transaction> </account> </group> <group> <name>regular members</name> <account id="2"> <name>Account 2</name> <transaction id="5"> <type>payment</type> <value>-103.0000</value> </transaction> </account> </group> <group> <name>regular members</name> <account id="3"> <name>Account 3</name> <transaction id="2"> <type>credit</type> <value>3.9500</value> </transaction> </account> </group> </transactions>';

EXEC sp_xml_preparedocument @doc OUTPUT, @xml;

SELECT *
FROM OPENXML(@doc, '/transactions/group/account/transaction', 11)
WITH (id INT, type NVARCHAR(255), value MONEY);

EXEC sp_xml_removedocument @doc;

 openxml simple

At the beginning the sp_xml_preparedocument procedure is used to create DOM from the XML document. The DOM object gets a handle assigned (@doc) which is used for referencing in the OPENXML statement. The /transactions/group/account/transaction points to nodes in the document that are converted to rows. The number 11 indicates that both: attributes and elements store data. Other options are:

  • 1 - only attributes are used
  • 2 - only elements are used

The WITH part indicates columns that will be created in the result set. Names of the columns are names of the attributes/elements in the document at the same time. It means that the id column will contain data from the /transactions/group/account/transaction/id path, type will use data from the /transactions/group/account/transaction/type path and the database engine will look into /transactions/group/account/transaction/value path for the value column.

It is worth emphasizing that the id column comes from an attribute while two other columns are extracted from elements. The flag argument of OPENXML that is set to 11 allows that. If 1 was used, the type and value columns would contain NULL values. If 2 was used, the id column would be NULL.

Obviously, as the DOM object was created, it had to be destroyed at the end. The sp_xml_removedocument procedure did exactly that.


Extracting data from different levels

The previous example showed the whole concept of shredding XML documents to tables with OPENXML statement. Although, I believe you remember that I was able to produce the XML document with only one query but the above example extracts only a part of data. Why could not I convert the whole XML document in one shot, not only the transaction nodes? Let's assume I want to get a table with the following columns:

  • group name
  • account id
  • account name
  • transaction id
  • transaction type
  • transaction value

They all describe somehow a transaction but this data comes from different nesting levels from the XML document. Fortunately, OPENXML allows being more precise in directing the SQL Server engine what is the source of data. The exact path can be defined separately for each column in the WITH clause as in the below script.

DECLARE @xml NVARCHAR(4000);
DECLARE @doc INT;
SET @xml =
'<transactions> <group> <name>gold members</name> <account id="1"> <name>Account 1</name> <transaction id="1"> <type>credit</type> <value>10000.0000</value> </transaction> </account> </group> <group> <name>regular members</name> <account id="2"> <name>Account 2</name> <transaction id="5"> <type>payment</type> <value>-103.0000</value> </transaction> </account> </group> <group> <name>regular members</name> <account id="3"> <name>Account 3</name> <transaction id="2"> <type>credit</type> <value>3.9500</value> </transaction> </account> </group> </transactions>';

EXEC sp_xml_preparedocument @doc OUTPUT, @xml;

SELECT *
FROM OPENXML(@doc, '/transactions/group/account/transaction', 11)
WITH (groupName NVARCHAR(255) '../../name', accountId INT '../@id', accountName NVARCHAR(255) '../name', transId INT '@id', transType NVARCHAR(255) 'type', transValue MONEY 'value');

EXEC sp_xml_removedocument @doc;

 openxml diff levels

There are a few interesting items:

  1. I still used the same main path to the transaction - /transactions/group/account/transaction.
  2. I used a relative path to data for each column. For example groupName used ../../name which is two levels above the transaction nodes. It is an equivalent of /transactions/group/name.
  3. To distinguish an attribute name from an element, the @ sign was used like you can see for the transId or accountId columns.


Last word

Probably some of you reading about creating a DOM object for an XML document wondered isn't it an overhead compared to parsing it on the fly? Hmm ... yeah. It might be. If you need to convert multiple rows with XML documents to a table, it might be a performance killer to create a DOM object separately for each row. On the other hand, if you want to execute many queries with OPENXML on the same document, this solution may be perfect.

Nevertheless, there are no solutions that are always perfect or terrible. This one is not an exception.

Look forward to my next articles about XML support in SQL Server, I may write about the second option of shredding XML documents to relational form.


Connect Android to MS SQL Database.

 https://parallelcodes.com/connect-android-to-ms-sql-database-2/


android ms sql database app

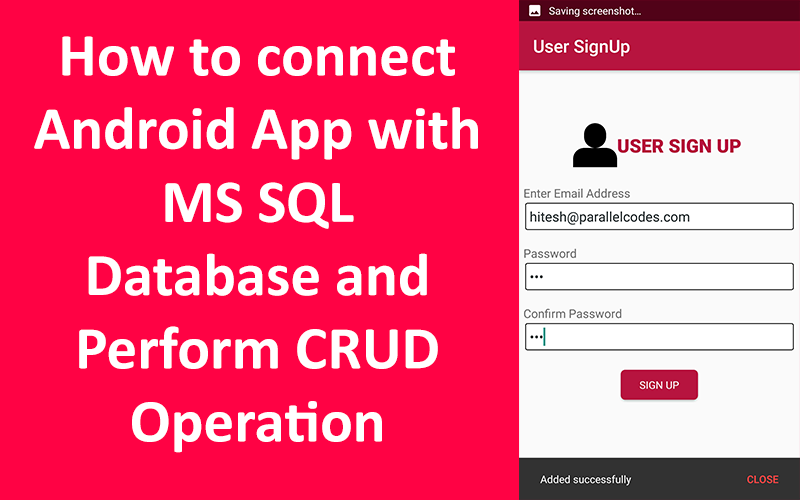
In this post we will see how we can connect our Android Application to MS SQL Database server directly and perform CRUD operations. We will use JTDS.jar library for connecting with Database.

Download jtds library using this link: Jtds library.

Next we will create our MS SQL Database. My Database name is CustomerDB. It is a Microsoft SQL 2014 Database.

Script:

--create database CustomerDB
--USE [CustomersDB]

CREATE TABLE [dbo].[tblUsers](
[Id] [int] IDENTITY(1,1) NOT NULL,
[UserId] [nvarchar](50) NOT NULL,
[Password] [nvarchar](50) NOT NULL,
[OnDate] [datetime] NULL DEFAULT (getdate()),
[UserRole] [nvarchar](50) NULL
)

Copy the downloaded library in your Android project’s library folder and add it as a library to your project.

Android MS SQL - Add as Library JTDS library

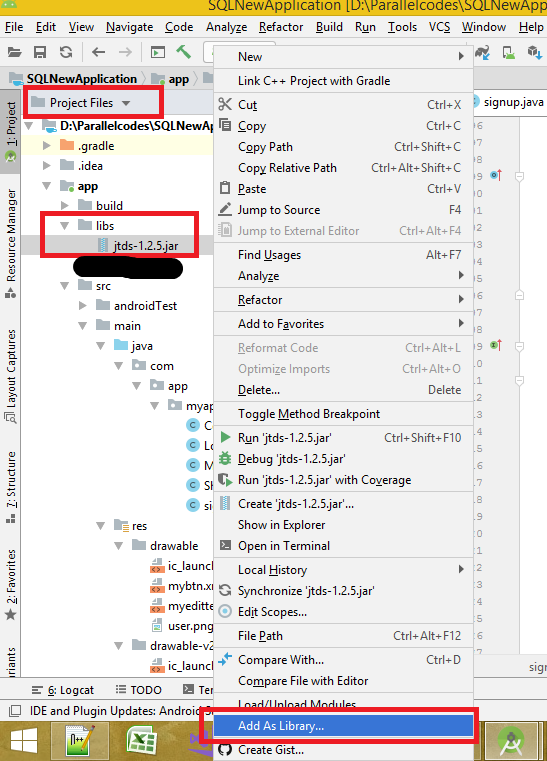
Android MS SQL – Add as Library JTDS library

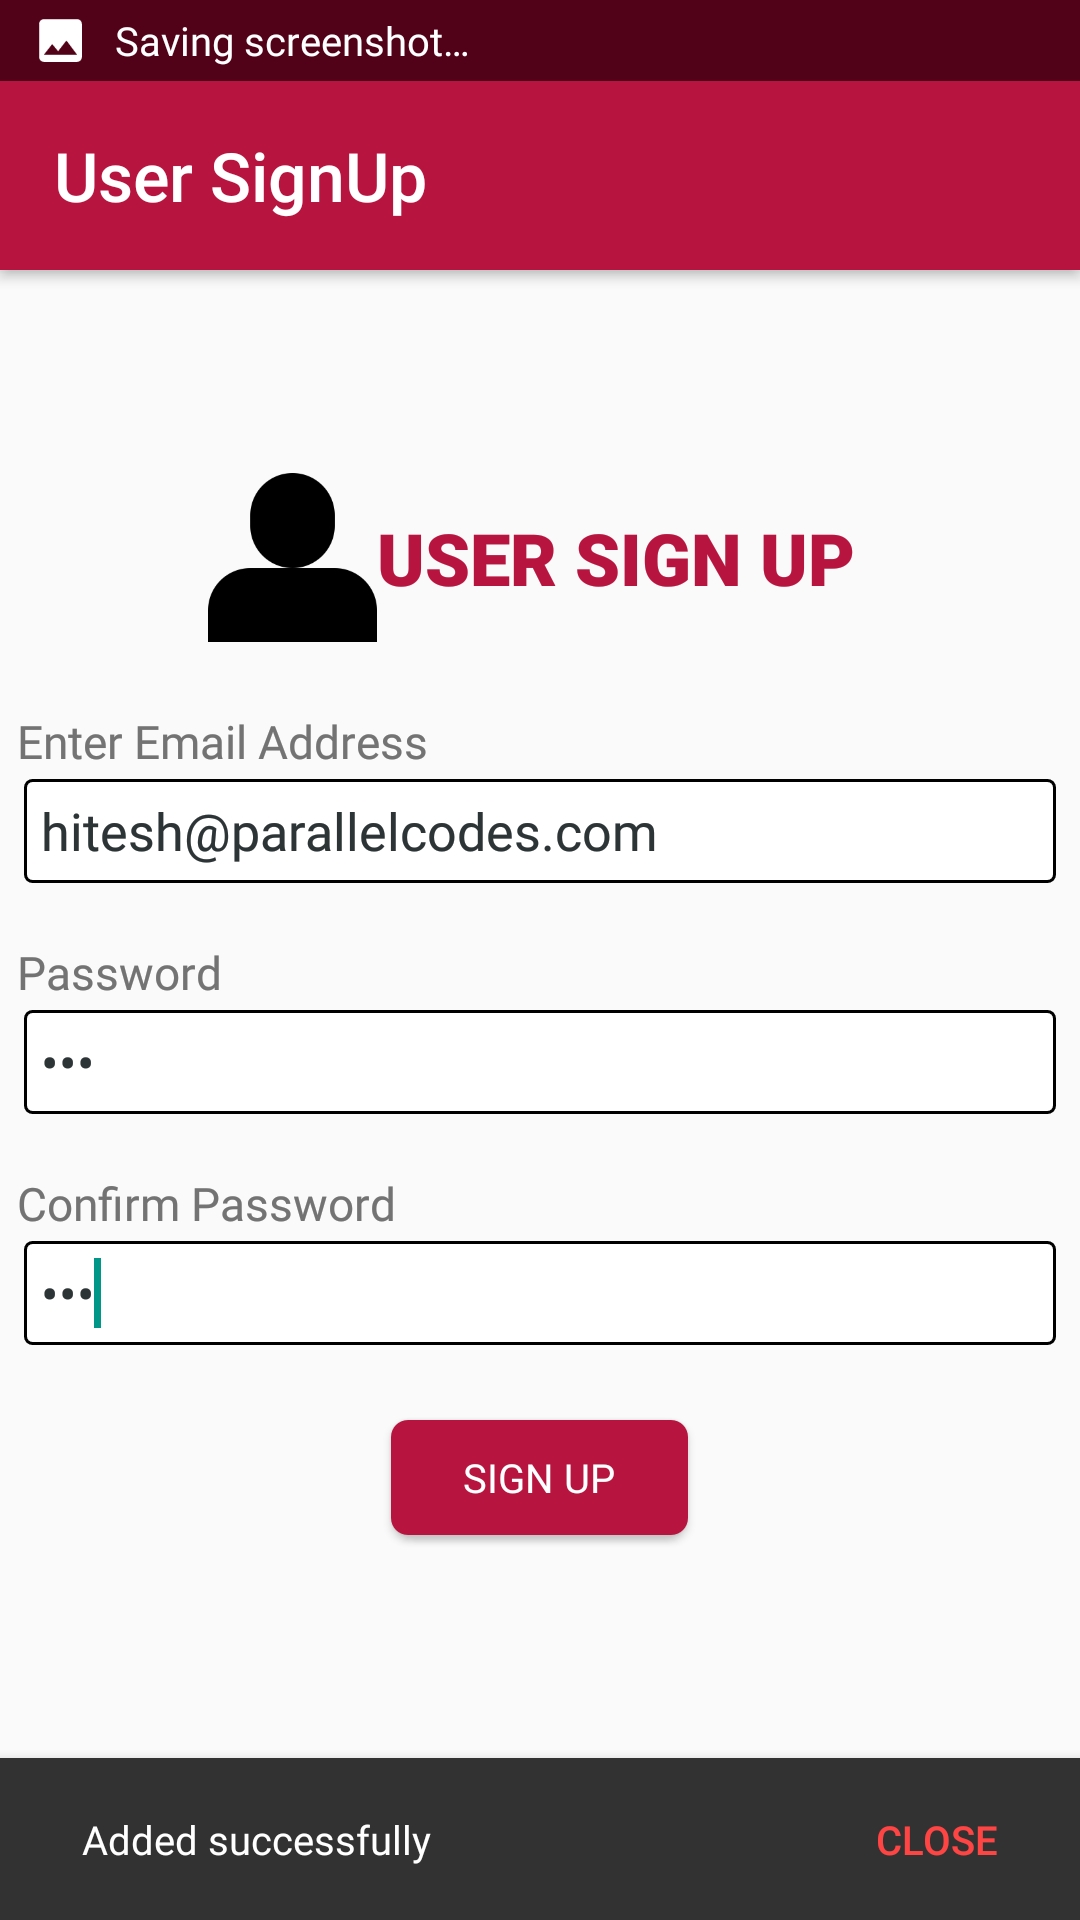
Now let’s create the layout of our app.

Create a layout file with name signup.xml in your res > layout > folder and edit it as below: 

res > layout > signup.xml:

<?xml version="1.0" encoding="utf-8"?>
<LinearLayout xmlns:android="http://schemas.android.com/apk/res/android"
android:layout_width="match_parent"
android:layout_height="match_parent"
android:orientation="vertical"
android:id="@+id/lvparent"
android:padding="5dp">

<LinearLayout
android:layout_width="wrap_content"
android:layout_height="wrap_content"
android:layout_gravity="center_horizontal"
android:layout_marginTop="50dp"
android:orientation="horizontal"
android:padding="5dp">

<ImageView
android:layout_width="50dp"
android:layout_height="50dp"
android:layout_gravity="center_vertical"
android:src="@drawable/user" />

<TextView
android:layout_width="match_parent"
android:layout_height="wrap_content"
android:layout_gravity="center_vertical"
android:layout_marginRight="5dp"
android:fontFamily="sans-serif-black"
android:gravity="center_horizontal"
android:text="USER SIGN UP"
android:textColor="#b71540"
android:textSize="25sp" />
</LinearLayout>

<TextView
android:layout_width="match_parent"
android:layout_height="wrap_content"
android:layout_marginTop="15dp"
android:fontFamily="sans-serif-condensed-medium"
android:gravity="start"
android:text="Enter Email Address"
android:textSize="16sp" />

<EditText
android:id="@+id/edtEmailAddress"
android:layout_width="match_parent"
android:layout_height="wrap_content"
android:layout_margin="2dp"
android:background="@drawable/myedittextbg"
android:fontFamily="sans-serif-condensed-medium"
android:hint="Email Address"
android:padding="5dp"
android:textColor="#2d3436" />

<TextView
android:layout_width="match_parent"
android:layout_height="wrap_content"
android:layout_marginTop="15dp"
android:fontFamily="sans-serif-condensed-medium"
android:gravity="start"
android:text="Password"
android:textSize="16sp" />

<EditText
android:id="@+id/edtPassword"
android:layout_width="match_parent"
android:layout_height="wrap_content"
android:layout_margin="2dp"
android:background="@drawable/myedittextbg"
android:fontFamily="sans-serif-condensed-medium"
android:hint="Enter Password"
android:padding="5dp"
android:inputType="textPassword"
android:textColor="#2d3436" />

<TextView
android:layout_width="match_parent"
android:layout_height="wrap_content"
android:layout_marginTop="15dp"
android:fontFamily="sans-serif-condensed-medium"
android:gravity="start"
android:text="Confirm Password"
android:textSize="16sp" />

<EditText
android:id="@+id/edtConfirmPassword"
android:layout_width="match_parent"
android:layout_height="wrap_content"
android:layout_margin="2dp"
android:background="@drawable/myedittextbg"
android:fontFamily="sans-serif-condensed-medium"
android:hint="Confirm Password"
android:padding="5dp"
android:inputType="textPassword"
android:textColor="#2d3436" />

<Button
android:id="@+id/btnSignUp"
android:layout_width="wrap_content"
android:layout_height="34dp"
android:layout_gravity="center_horizontal"
android:layout_marginTop="20dp"
android:background="@drawable/mybtn"
android:fontFamily="sans-serif-condensed-medium"
android:text="SIGN UP"
android:textColor="#fff" />

<ProgressBar
android:id="@+id/pbbar"
android:layout_width="wrap_content"
android:layout_height="wrap_content"
android:layout_gravity="center_horizontal" />
</LinearLayout>

Now create two drawable design files to design our buttons and edittext.

res > drawable > mybtn.xml:

<?xml version="1.0" encoding="utf-8"?>

<shape
xmlns:android="http://schemas.android.com/apk/res/android"
android:shape="rectangle"
android:padding="2dp">
<solid android:color="#b71540"/>

<corners
android:radius="5dp"/>
</shape>

res > layout > myedittextbg.xml:

<?xml version="1.0" encoding="utf-8"?>

<shape
    xmlns:android="http://schemas.android.com/apk/res/android"
    android:shape="rectangle"
    android:padding="10dp">
    <solid android:color="#fff"/>
    <stroke android:color="#000" android:width="1dp"/>
    <corners
        android:radius="2dp"/>
</shape>

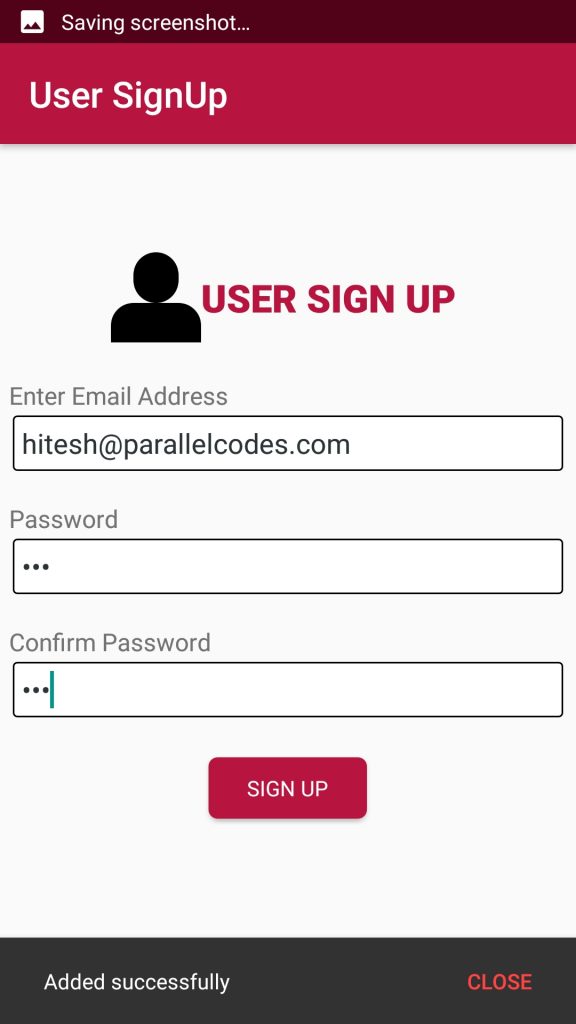
This design contains three android edittext text boxes. For getting email address, password and confirm password from users. We will add user information from our app to ms sql database.

android ms sql database app

How to connect Android app with MS SQL Database

Create a java file in your android’s project with name ConnectionHelper.java and edit it as below:

ConnectionHelper.java:

package com.app.myapplication;

import android.annotation.SuppressLint;
import android.os.StrictMode;
import android.util.Log;

import java.sql.Connection;
import java.sql.DriverManager;
import java.sql.SQLException;

public class ConnectionHelper {


    @SuppressLint("NewApi")
    public static Connection CONN() {

        String _user = "sa";
        String _pass = "789";
        String _DB = "CustomersDB";
        String _server = "192.168.0.104";
        StrictMode.ThreadPolicy policy = new StrictMode.ThreadPolicy.Builder()
                .permitAll().build();
        StrictMode.setThreadPolicy(policy);
        Connection conn = null;
        String ConnURL = null;
        try {
            Class.forName("net.sourceforge.jtds.jdbc.Driver");
            ConnURL = "jdbc:jtds:sqlserver://" + _server + ";"
                    + "databaseName=" + _DB + ";user=" + _user + ";password="
                    + _pass + ";";
            conn = DriverManager.getConnection(ConnURL);
        } catch (SQLException se) {
            Log.e("ERRO", se.getMessage());
        } catch (ClassNotFoundException e) {
            Log.e("ERRO", e.getMessage());
        } catch (Exception e) {
            Log.e("ERRO", e.getMessage());
        }
        return conn;
    }
}

This class will return a database connection object which can be used to connect with our database and add users information.
Now create a class with name signup.java and edit it as below:

signup.java:

package com.app.myapplication;

import java.sql.Connection;
import java.sql.DriverManager;
import java.sql.PreparedStatement;
import java.sql.ResultSet;
import java.sql.SQLException;
import java.text.DateFormat;
import java.text.SimpleDateFormat;
import java.util.ArrayList;
import java.util.Calendar;

import android.annotation.SuppressLint;
import android.app.Activity;
import android.app.ProgressDialog;
import android.media.tv.TvContract;
import android.os.AsyncTask;
import android.os.Bundle;
import android.os.StrictMode;
import android.support.design.widget.Snackbar;
import android.support.v7.app.AppCompatActivity;
import android.util.Log;
import android.view.Menu;
import android.view.MenuItem;
import android.view.View;
import android.widget.AdapterView;
import android.widget.AdapterView.OnItemSelectedListener;
import android.widget.ArrayAdapter;
import android.widget.Button;
import android.widget.EditText;
import android.widget.LinearLayout;
import android.widget.ProgressBar;
import android.widget.Spinner;
import android.widget.Toast;

public class signup extends AppCompatActivity {

    EditText edtEmailAddress, edtPassword, edtConfirmPassword;
    Button btnSignUp;
    ProgressBar progressBar;
    LinearLayout lvparent;

    @Override
    protected void onCreate(Bundle savedInstanceState) {
        super.onCreate(savedInstanceState);
        setContentView(R.layout.signup);

        edtEmailAddress = findViewById(R.id.edtEmailAddress);
        edtPassword = findViewById(R.id.edtPassword);
        edtConfirmPassword = findViewById(R.id.edtConfirmPassword);
        btnSignUp = findViewById(R.id.btnSignUp);
        progressBar = findViewById(R.id.pbbar);
        lvparent = findViewById(R.id.lvparent);
        this.setTitle("User SignUp");

        btnSignUp.setOnClickListener(new View.OnClickListener() {
            @Override
            public void onClick(View v) {

                if (isEmpty(edtEmailAddress.getText().toString()) ||
                        isEmpty(edtPassword.getText().toString()) ||
                        isEmpty(edtConfirmPassword.getText().toString()))
                    ShowSnackBar("Please enter all fields");
                else if (!edtPassword.getText().toString().equals(edtConfirmPassword.getText().toString()))
                    ShowSnackBar("Password does not match");
                else {
                    AddUsers addUsers = new AddUsers();
                    addUsers.execute("");
                }

            }
        });
    }

    public void ShowSnackBar(String message) {
        Snackbar.make(lvparent, message, Snackbar.LENGTH_LONG)
                .setAction("CLOSE", new View.OnClickListener() {
                    @Override
                    public void onClick(View view) {

                    }
                })
                .setActionTextColor(getResources().getColor(android.R.color.holo_red_light))
                .show();
    }

    public Boolean isEmpty(String strValue) {
        if (strValue == null || strValue.trim().equals(("")))
            return true;
        else
            return false;
    }

    private class AddUsers extends AsyncTask<String, Void, String> {
        String emailId, password;


        @Override
        protected void onPreExecute() {
            super.onPreExecute();

            emailId = edtEmailAddress.getText().toString();
            password = edtPassword.getText().toString();
            progressBar.setVisibility(View.VISIBLE);
            btnSignUp.setVisibility(View.GONE);
        }

        @Override
        protected String doInBackground(String... params) {

            try {
                ConnectionHelper con = new ConnectionHelper();
                Connection connect = ConnectionHelper.CONN();

                String queryStmt = "Insert into tblUsers " +
                        " (UserId,Password,UserRole) values "
                        + "('"
                        + emailId
                        + "','"
                        + password
                        + "','User')";

                PreparedStatement preparedStatement = connect
                        .prepareStatement(queryStmt);

                preparedStatement.executeUpdate();

                preparedStatement.close();

                return "Added successfully";
            } catch (SQLException e) {
                e.printStackTrace();
                return e.getMessage().toString();
            } catch (Exception e) {
                return "Exception. Please check your code and database.";
            }
        }

        @Override
        protected void onPostExecute(String result) {

            //Toast.makeText(signup.this, result, Toast.LENGTH_SHORT).show();
            ShowSnackBar(result);
            progressBar.setVisibility(View.GONE);
            btnSignUp.setVisibility(View.VISIBLE);
            if (result.equals("Added successfully")) {
                // Clear();
            }

        }
    }

}

The AddUsers method will add the information into our database. We will first check if the information provided is correct and valid and then call AddUsers method to add data.


SQL Error: The executeQuery method must return a result set

 https://stackoverflow.com/questions/18998700/sql-error-the-executequery-method-must-return-a-result-set


To return data from a SELECT Statement

String sql_select = "Select name from people";

Statement st_1 = connection.createStatement();
ResultSet rs_1 = st_1.executeQuery((sql_select));

To just run an UPDATE statement

String sql_update = "Update people set name = 'Natalie' 
Statement st_2 = connection.createStatement();
st_2.executeUpdate(sql_update);


Build was configured to prefer settings repositories over project repositories but repository 'maven' was added by build file 'build.gradle'

 https://stackoverflow.com/questions/69163511/build-was-configured-to-prefer-settings-repositories-over-project-repositories-b


You can add jitpack.io as a repository inside dependencyResolutionManagement in settings.gradle

dependencyResolutionManagement {
    repositoriesMode.set(RepositoriesMode.FAIL_ON_PROJECT_REPOS)
    repositories {
        google()
        mavenCentral()
        maven { url 'https://jitpack.io' }
    }
}


Android Studio 3.6.1 | Error: "This project uses AndroidX dependencies"

 https://stackoverflow.com/questions/60506895/android-studio-3-6-1-error-this-project-uses-androidx-dependencies


The Android Gradle plugin provides the following global flags that you can set in your gradle.properties file:

android.useAndroidX: When set to true, this flag indicates that you want to start using AndroidX from now on. If the flag is absent, Android Studio behaves as if the flag were set to false.

android.enableJetifier: When set to true, this flag indicates that you want to have tool support (from the Android Gradle plugin) to automatically convert existing third-party libraries as if they were written for AndroidX. If the flag is absent, Android Studio behaves as if the flag were set to false.

To enable jetifier, add those two lines to your gradle.properties file:

android.useAndroidX=true
android.enableJetifier=true